This is the multi-page printable view of this section. Click here to print.
Integrations
1 - Envoy AI Gateway
Envoy AI Gateway is an open source project for using Envoy Gateway to handle request traffic from application clients to Generative AI services.
How to use
Enable Envoy Gateway and Envoy AI Gateway
Both of them are already enabled by default in values.global.yaml and will be deployed in llmaz-system.
envoy-gateway:
    enabled: true
envoy-ai-gateway:
    enabled: true
However, Envoy Gateway and Envoy AI Gateway can be deployed standalone in case you want to deploy them in other namespaces.
Basic Example
To expose your models via Envoy Gateway, you need to create a GatewayClass, Gateway, and AIGatewayRoute. The following example shows how to do this.
We’ll deploy two models Qwen/Qwen2-0.5B-Instruct-GGUF and Qwen/Qwen2.5-Coder-0.5B-Instruct-GGUF with llama.cpp (cpu only) and expose them via Envoy AI Gateway.
The full example is here, apply it.
kubectl apply -f https://raw.githubusercontent.com/InftyAI/llmaz/refs/heads/main/docs/examples/envoy-ai-gateway/basic.yaml
Query AI Gateway APIs
If Open-WebUI is enabled, you can chat via the webui (recommended), see documentation. Otherwise, following the steps below to test the Envoy AI Gateway APIs.
I. Port-forwarding the LoadBalancer service in llmaz-system, like:
kubectl -n llmaz-system port-forward \
  $(kubectl -n llmaz-system get svc \
    -l gateway.envoyproxy.io/owning-gateway-name=default-envoy-ai-gateway \
    -o name) \
  8080:80
II. Query curl http://localhost:8080/v1/models | jq ., available models will be listed. Expected response will look like this:
{
  "data": [
    {
      "id": "qwen2-0.5b",
      "created": 1745327294,
      "object": "model",
      "owned_by": "Envoy AI Gateway"
    },
    {
      "id": "qwen2.5-coder",
      "created": 1745327294,
      "object": "model",
      "owned_by": "Envoy AI Gateway"
    }
  ],
  "object": "list"
}
III. Query http://localhost:8080/v1/chat/completions to chat with the model. Here, we ask the qwen2-0.5b model, the query will look like:
curl -H "Content-Type: application/json"     -d '{
        "model": "qwen2-0.5b",
        "messages": [
            {
                "role": "system",
                "content": "Hi."
            }
        ]
    }'     http://localhost:8080/v1/chat/completions | jq .
Expected response will look like this:
{
  "choices": [
    {
      "finish_reason": "stop",
      "index": 0,
      "message": {
        "role": "assistant",
        "content": "Hello! How can I assist you today?"
      }
    }
  ],
  "created": 1745327371,
  "model": "qwen2-0.5b",
  "system_fingerprint": "b5124-bc091a4d",
  "object": "chat.completion",
  "usage": {
    "completion_tokens": 10,
    "prompt_tokens": 10,
    "total_tokens": 20
  },
  "id": "chatcmpl-AODlT8xnf4OjJwpQH31XD4yehHLnurr0",
  "timings": {
    "prompt_n": 1,
    "prompt_ms": 319.876,
    "prompt_per_token_ms": 319.876,
    "prompt_per_second": 3.1262114069201816,
    "predicted_n": 10,
    "predicted_ms": 1309.393,
    "predicted_per_token_ms": 130.9393,
    "predicted_per_second": 7.63712651587415
  }
}
2 - Karpenter
Karpenter automatically launches just the right compute resources to handle your cluster’s applications, but it is built to adhere to the scheduling decisions of kube-scheduler, so it’s certainly possible we would run across some cases where Karpenter makes incorrect decisions when the InftyAI scheduler is in the mix.
We forked the Karpenter project and re-complie the karpenter image for cloud providers like AWS, and you can find the details in this proposal. This document provides deployment steps to install and configure Customized Karpenter in an EKS cluster.
How to use
Set environment variables
export KARPENTER_NAMESPACE="kube-system"
export KARPENTER_VERSION="1.5.0"
export K8S_VERSION="1.32"

export AWS_PARTITION="aws" # if you are not using standard partitions, you may need to configure to aws-cn / aws-us-gov
export CLUSTER_NAME="${USER}-karpenter-demo"
export AWS_DEFAULT_REGION="us-west-2"
export AWS_ACCOUNT_ID="$(aws sts get-caller-identity --query Account --output text)"
export TEMPOUT="$(mktemp)"
export ALIAS_VERSION="$(aws ssm get-parameter --name "/aws/service/eks/optimized-ami/${K8S_VERSION}/amazon-linux-2023/x86_64/standard/recommended/image_id" --query Parameter.Value | xargs aws ec2 describe-images --query 'Images[0].Name' --image-ids | sed -r 's/^.*(v[[:digit:]]+).*$/\1/')"
If you open a new shell to run steps in this procedure, you need to set some or all of the environment variables again. To remind yourself of these values, type:
echo "${KARPENTER_NAMESPACE}" "${KARPENTER_VERSION}" "${K8S_VERSION}" "${CLUSTER_NAME}" "${AWS_DEFAULT_REGION}" "${AWS_ACCOUNT_ID}" "${TEMPOUT}" "${ALIAS_VERSION}"
Create a cluster and add Karpenter
Please refer to the Getting Started with Karpenter to create a cluster and add Karpenter.
Install the gpu operator
helm repo add nvidia https://helm.ngc.nvidia.com/nvidia \
    && helm repo update
helm install --wait --generate-name \
    -n gpu-operator --create-namespace \
    nvidia/gpu-operator \
    --version=v25.3.0
Install llmaz with InftyAI scheduler enabled
Please refer to heterogeneous cluster support.
Configure Karpenter with customized image
We need to assign the karpenter-core-llmaz cluster role to the karpenter service account and update the karpenter image to the customized one.
cat <<EOF | envsubst | kubectl apply -f -
apiVersion: rbac.authorization.k8s.io/v1
kind: ClusterRoleBinding
metadata:
  name: karpenter-core-llmaz
roleRef:
  apiGroup: rbac.authorization.k8s.io
  kind: ClusterRole
  name: karpenter-core-llmaz
subjects:
- kind: ServiceAccount
  name: karpenter
  namespace: ${KARPENTER_NAMESPACE}
---
apiVersion: rbac.authorization.k8s.io/v1
kind: ClusterRole
metadata:
  name: karpenter-core-llmaz
rules:
- apiGroups: ["llmaz.io"]
  resources: ["openmodels"]
  verbs: ["get", "list", "watch"]
EOF

helm upgrade --install karpenter oci://public.ecr.aws/karpenter/karpenter --version "${KARPENTER_VERSION}" --namespace "${KARPENTER_NAMESPACE}" --create-namespace \
  --set "settings.clusterName=${CLUSTER_NAME}" \
  --set "settings.interruptionQueue=${CLUSTER_NAME}" \
  --set controller.resources.requests.cpu=1 \
  --set controller.resources.requests.memory=1Gi \
  --set controller.resources.limits.cpu=1 \
  --set controller.resources.limits.memory=1Gi \
  --wait \
  --set controller.image.repository=inftyai/karpenter-provider-aws \
  --set "controller.image.tag=${KARPENTER_VERSION}" \
  --set controller.image.digest=""
Basic Example
- Create a gpu node pool
cat <<EOF | envsubst | kubectl apply -f -
apiVersion: karpenter.k8s.aws/v1
kind: EC2NodeClass
metadata:
  name: llmaz-demo            # you can change the name to a more meaningful one, please align with the node pool's nodeClassRef.
spec:
  amiSelectorTerms:
  - alias: al2023@${ALIAS_VERSION}
  blockDeviceMappings:
  # the default volume size of the selected AMI is 20Gi, it is not enough for kubelet to pull
  # the images and run the workloads. So we need to map a larger volume to the root device.
  # You can change the volume size to a larger value according to your actual needs.
  - deviceName: /dev/xvda
    ebs:
      deleteOnTermination: true
      volumeSize: 50Gi
      volumeType: gp3
  role: KarpenterNodeRole-${CLUSTER_NAME}          # replace with your cluster name
  securityGroupSelectorTerms:
  - tags:
      karpenter.sh/discovery: ${CLUSTER_NAME}      # replace with your cluster name
  subnetSelectorTerms:
  - tags:
      karpenter.sh/discovery: ${CLUSTER_NAME}      # replace with your cluster name
---
apiVersion: karpenter.sh/v1
kind: NodePool
metadata:
  name: llmaz-demo-gpu-nodepool  # you can change the name to a more meaningful one.
spec:
  disruption:
    budgets:
    - nodes: 10%
    consolidateAfter: 5m
    consolidationPolicy: WhenEmptyOrUnderutilized
  limits:  # You can change the limits to match your actual needs.
    cpu: 1000
  template:
    spec:
      expireAfter: 720h
      nodeClassRef:
        group: karpenter.k8s.aws
        kind: EC2NodeClass
        name: llmaz-demo
      requirements:
      - key: kubernetes.io/arch
        operator: In
        values:
        - amd64
      - key: kubernetes.io/os
        operator: In
        values:
        - linux
      - key: karpenter.sh/capacity-type
        operator: In
        values:
        - spot
      - key: karpenter.k8s.aws/instance-family
        operator: In
        values:                                # replace with your instance-family with gpu supported
        - g4dn
        - g5g
      taints:
      - effect: NoSchedule
        key: nvidia.com/gpu
        value: "true"
- Deploy a model with flavors
cat <<EOF | kubectl apply -f -
apiVersion: llmaz.io/v1alpha1
kind: OpenModel
metadata:
  name: qwen2-0--5b
spec:
  familyName: qwen2
  source:
    modelHub:
      modelID: Qwen/Qwen2-0.5B-Instruct
  inferenceConfig:
    flavors:
      # The g5g instance family in the aws cloud can provide the t4g GPU type.
      # we define the instance family in the node pool like llmaz-demo-gpu-nodepool.
      - name: t4g
        limits:
          nvidia.com/gpu: 1
        # The flavorName is not recongnized by the Karpenter, so we need to specify the
        # instance-gpu-name via nodeSelector to match the t4g GPU type when node is provisioned
        # by Karpenter from multiple node pools.
        #
        # When you only have a single node pool to provision the GPU instance and the node pool
        # only has one GPU type, it is okay to not specify the nodeSelector. But in practice,
        # it is better to specify the nodeSelector to make the provisioned node more predictable.
        #
        # The available node labels for selecting the target GPU device is listed below:
        # karpenter.k8s.aws/instance-gpu-count
        # karpenter.k8s.aws/instance-gpu-manufacturer
        # karpenter.k8s.aws/instance-gpu-memory
        # karpenter.k8s.aws/instance-gpu-name
        nodeSelector:
          karpenter.k8s.aws/instance-gpu-name: t4g
      # The g4dn instance family in the aws cloud can provide the t4 GPU type.
      # we define the instance family in the node pool like llmaz-demo-gpu-nodepool.
      - name: t4
        limits:
          nvidia.com/gpu: 1
        # The flavorName is not recongnized by the Karpenter, so we need to specify the
        # instance-gpu-name via nodeSelector to match the t4 GPU type when node is provisioned
        # by Karpenter from multiple node pools.
        #
        # When you only have a single node pool to provision the GPU instance and the node pool
        # only has one GPU type, it is okay to not specify the nodeSelector. But in practice,
        # it is better to specify the nodeSelector to make the provisioned node more predictable.
        #
        # The available node labels for selecting the target GPU device is listed below:
        # karpenter.k8s.aws/instance-gpu-count
        # karpenter.k8s.aws/instance-gpu-manufacturer
        # karpenter.k8s.aws/instance-gpu-memory
        # karpenter.k8s.aws/instance-gpu-name
        nodeSelector:
          karpenter.k8s.aws/instance-gpu-name: t4
---
# Currently, the Playground resource type does not support to configure tolerations
# for the generated pods. But luckily, when a pod with the `nvidia.com/gpu` resource
# is created on the eks cluster, the generated pod will be tweaked with the following
# tolerations:
#   - effect: NoExecute
#      key: node.kubernetes.io/not-ready
#      operator: Exists
#      tolerationSeconds: 300
#   - effect: NoExecute
#     key: node.kubernetes.io/unreachable
#     operator: Exists
#     tolerationSeconds: 300
#   - effect: NoSchedule
#     key: nvidia.com/gpu
#     operator: Exists
apiVersion: inference.llmaz.io/v1alpha1
kind: Playground
metadata:
  labels:
    llmaz.io/model-name: qwen2-0--5b
  name: qwen2-0--5b
spec:
  backendRuntimeConfig:
    backendName: tgi
    # Due to the limitation of our aws account, we have to decrease the resources to match
    # the avaliable instance type which is g4dn.xlarge. If your account has no such limitation,
    # you can remove the custom resources settings below.
    resources:
      limits:
        cpu: "2"
        memory: 4Gi
      requests:
        cpu: "2"
        memory: 4Gi
  modelClaim:
    modelName: qwen2-0--5b
  replicas: 1
EOF
3 - Open-WebUI
Open WebUI is a user-friendly AI interface with OpenAI-compatible APIs, serving as the default chatbot for llmaz.
Prerequisites
- Make sure EnvoyGateway and Envoy AI Gateway are installed, both of them are installed by default in llmaz. See AI Gateway for more details.
How to use
Enable Open WebUI
Open-WebUI is enabled by default in the values.global.yaml and will be deployed in llmaz-system.
open-webui:
  enabled: true
Set the Service Address
Run
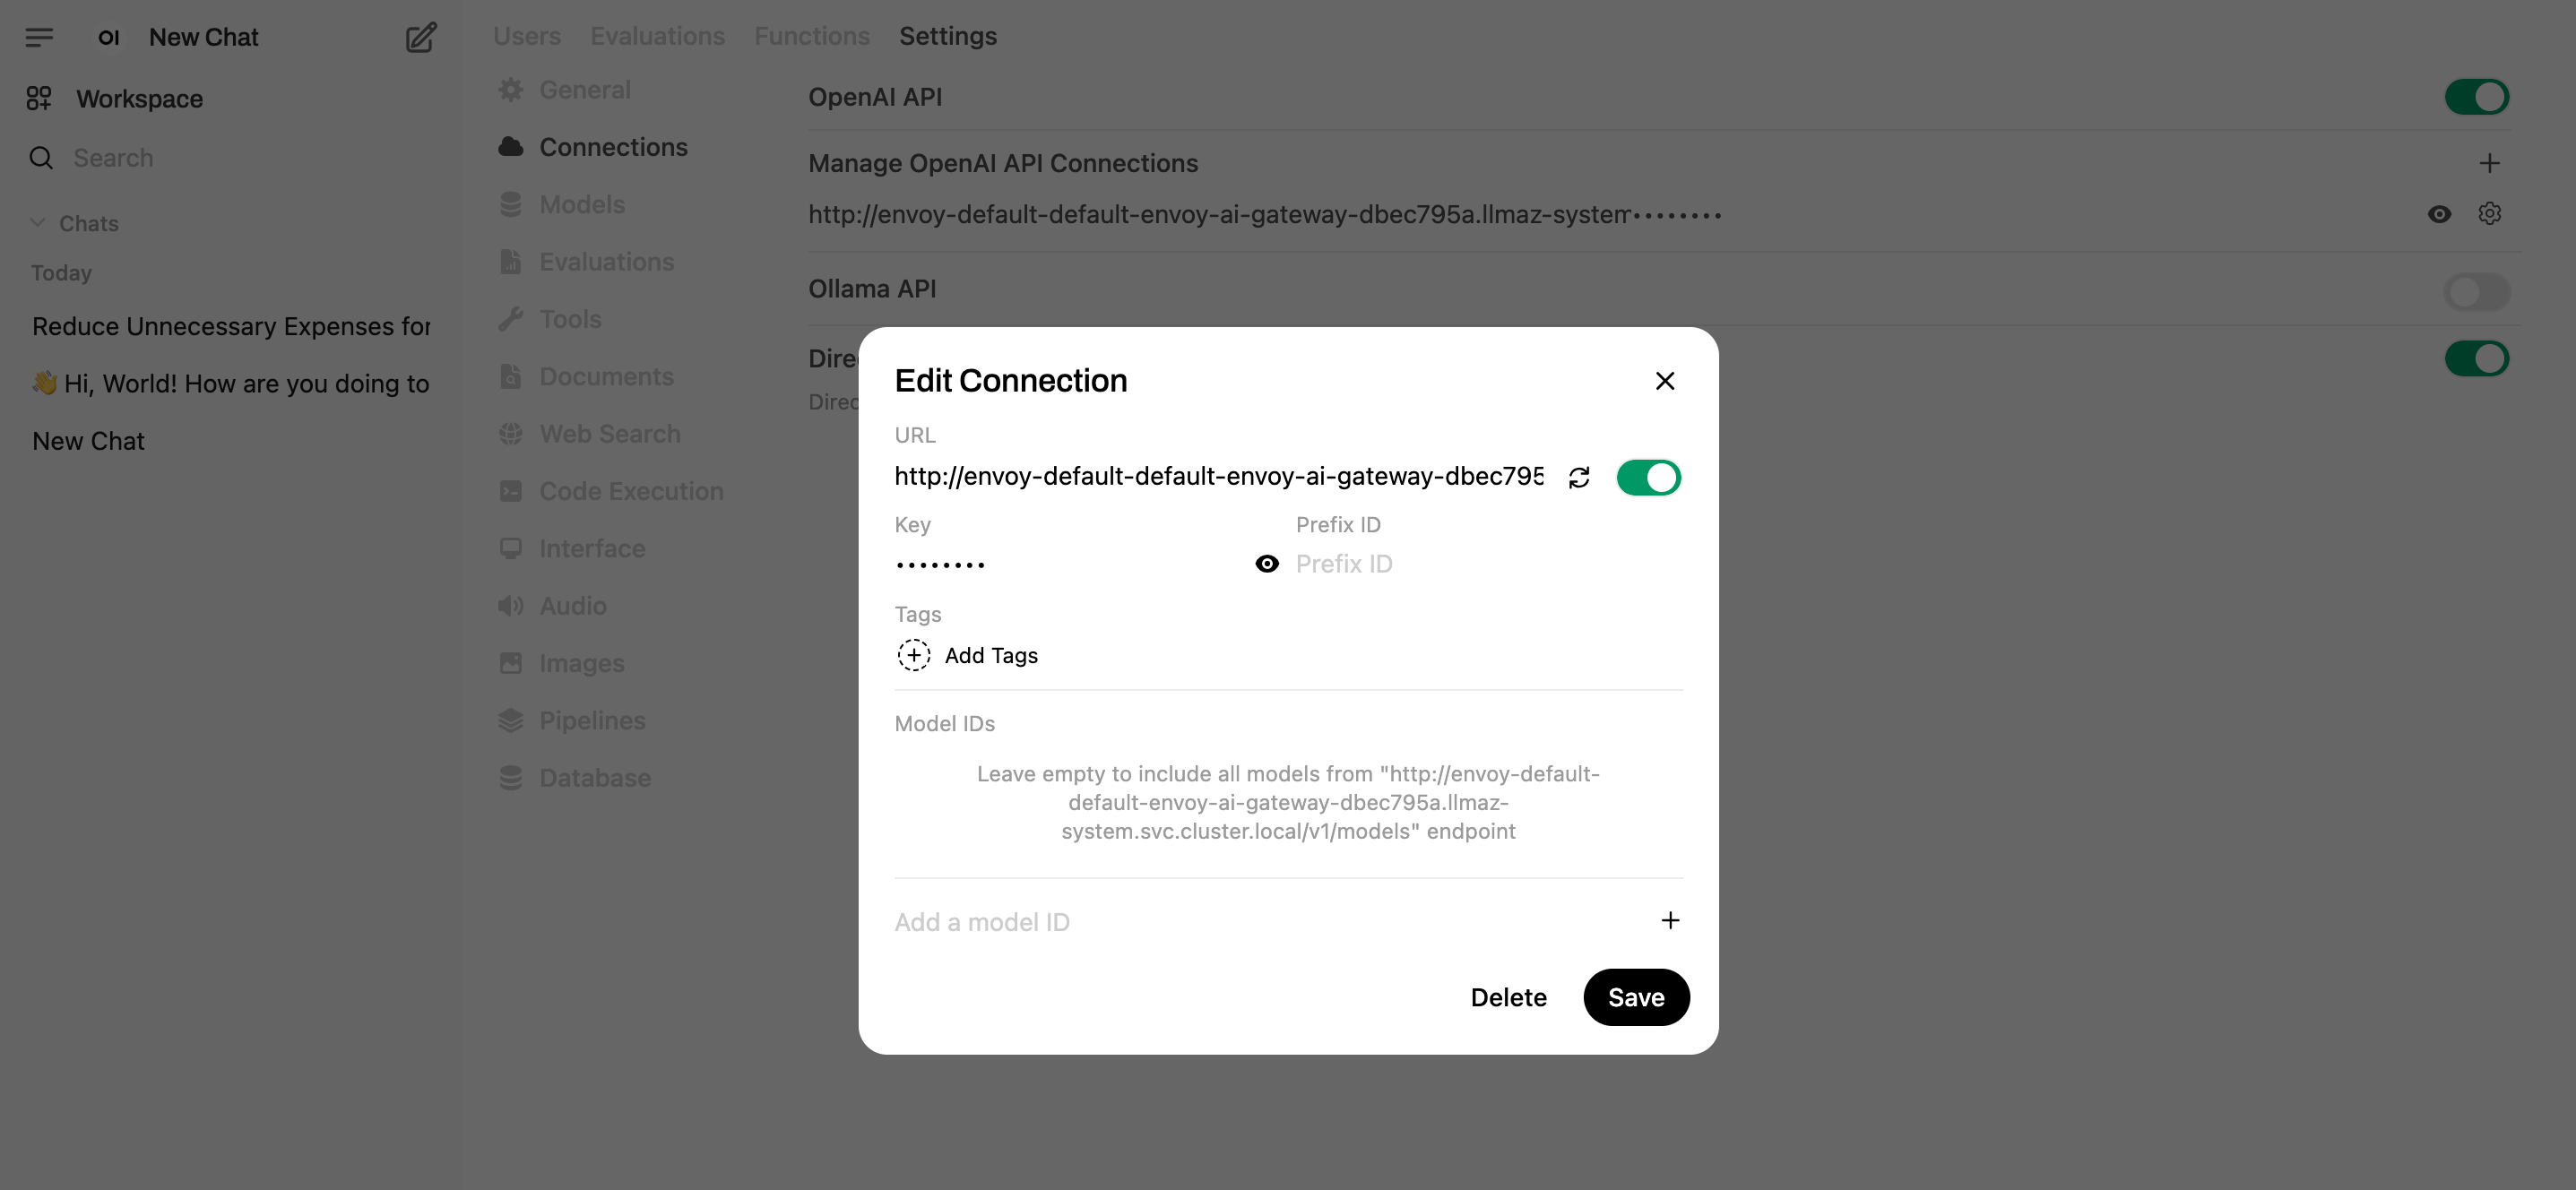
kubectl get svc -n llmaz-systemto list out the services, the output looks like below, the LoadBalancer service name will be used later.envoy-default-default-envoy-ai-gateway-dbec795a LoadBalancer 10.96.145.150 <pending> 80:30548/TCP 132m envoy-gateway ClusterIP 10.96.52.76 <none> 18000/TCP,18001/TCP,18002/TCP,19001/TCP 172mPort forward the Open-WebUI service, and visit
http://localhost:8080.kubectl port-forward svc/open-webui 8080:80 -n llmaz-systemClick
Settings -> Admin Settings -> Connections, set the URL tohttp://envoy-default-default-envoy-ai-gateway-dbec795a.llmaz-system.svc.cluster.local/v1and save. (You can also set theopenaiBaseApiUrlin thevalues.global.yaml)
- Start to chat now.
Persistence
Set the persistence=true in values.global.yaml to enable persistence.
4 - Prometheus Operator
This document provides deployment steps to install and configure Prometheus Operator in a Kubernetes cluster.
Install the prometheus operator
Please follow the documentation to install prometheus operator or simply run the following command:
curl -sL https://github.com/prometheus-operator/prometheus-operator/releases/download/v0.81.0/bundle.yaml | kubectl create -f -
Ensure that the Prometheus Operator Pod is running successfully.
# Installing the prometheus operator
root@VM-0-5-ubuntu:/home/ubuntu# kubectl get pods
NAME                                   READY   STATUS    RESTARTS   AGE
prometheus-operator-55b5c96cf8-jl2nx   1/1     Running   0          12s
Install the ServiceMonitor CR for llmaz
To enable monitoring for the llmaz system, you need to install the ServiceMonitor custom resource (CR).
You can either modify the Helm chart prometheus according to the documentation or use make install-prometheus in Makefile.
- Using Helm Chart: to modify the values.global.yaml
prometheus:
  # -- Whether to enable Prometheus metrics exporting.
  enable: true
- Using Makefile Command:
make install-prometheus
root@VM-0-5-ubuntu:/home/ubuntu/llmaz# make install-prometheus
kubectl apply --server-side -k config/prometheus
serviceaccount/llmaz-prometheus serverside-applied
clusterrole.rbac.authorization.k8s.io/llmaz-prometheus serverside-applied
clusterrolebinding.rbac.authorization.k8s.io/llmaz-prometheus serverside-applied
prometheus.monitoring.coreos.com/llmaz-prometheus serverside-applied
servicemonitor.monitoring.coreos.com/llmaz-controller-manager-metrics-monitor serverside-applied
Check Related Resources
Verify that the necessary resources have been created:
- ServiceMonitor
root@VM-0-5-ubuntu:/home/ubuntu/llmaz# kubectl get ServiceMonitor -n llmaz-system
NAME                                       AGE
llmaz-controller-manager-metrics-monitor   59s
- Prometheus Pods
root@VM-0-5-ubuntu:/home/ubuntu/llmaz# kubectl get pods -n llmaz-system
NAME                                        READY   STATUS    RESTARTS   AGE
llmaz-controller-manager-7ff8f7d9bd-vztls   2/2     Running   0          28s
prometheus-llmaz-prometheus-0               2/2     Running   0          27s
- Services
root@VM-0-5-ubuntu:/home/ubuntu/llmaz# kubectl get svc -n llmaz-system
NAME                                       TYPE        CLUSTER-IP      EXTERNAL-IP   PORT(S)    AGE
llmaz-controller-manager-metrics-service   ClusterIP   10.96.79.226    <none>        8443/TCP   46s
llmaz-webhook-service                      ClusterIP   10.96.249.226   <none>        443/TCP    46s
prometheus-operated                        ClusterIP   None            <none>        9090/TCP   45s
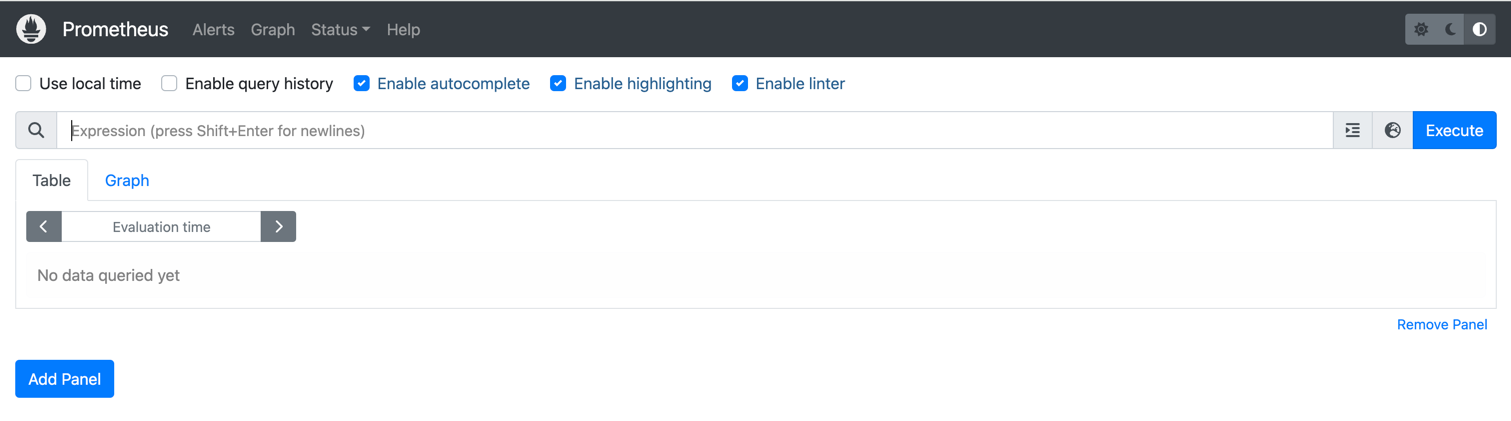
View metrics using the prometheus UI
Use port forwarding to access the Prometheus UI from your local machine:
root@VM-0-5-ubuntu:/home/ubuntu# kubectl port-forward services/prometheus-operated 9090:9090 --address 0.0.0.0 -n llmaz-system
Forwarding from 0.0.0.0:9090 -> 9090
If using kind, we can use port-forward, kubectl port-forward services/prometheus-operated 39090:9090 --address 0.0.0.0 -n llmaz-system
This allows us to access prometheus using a browser: http://localhost:9090/query